Individual Posing Tips—Part I: Top 6 Things to Remember
Back when I routinely wrote for Lolita Amino, I had written a small post on posing that I now know people have found extremely helpful. Since it’s been some time since I wrote those posts, and since I have more experience now, I’d like to take the time to revisit and expand on these tips based on what I know now and what I have seen. I’m planning on expanding this series to something huge and even more detailed, so stay tuned!
Overall, I’ve seen a vast improvement in posing in the general community since I’ve posted my original articles—which is amazing! I can tell that people are getting out there more, taking more photos, and practicing in front of mirrors before they head out to a photoshoot. Still, I thought I’d bring this information back into the public eye, since I’ve gotten a lot of positive feedback on this subject, and I’ve heard that it really helps people to hear the photographer’s point of view as well.
This post has a lot of information, so I encourage you to bookmark this page so you can slowly digest this information and absorb it slowly vs. trying to get it all in one go. These are more goal-oriented than specific things that a model does, however these are by far the most important items on this list, and you should do your best to remember them. If it’s too much to chew, pick your weakest area and focus on working on that for a bit, then come back and choose something else. These changes won’t happen overnight, but you’ll quickly see an improvement once you start focusing on them. The quick-fix tips will come later.
Note: There will be loads more to this series—including masculine/feminine posing, posing with other people, posing in fashion shows, posing for brand photoshoots, and tweaks posts—so I plan on making a posing index post once it’s all up so you can just bookmark that for easy reference instead of hunting down individual posts in the gigantic Wunderwelt Libre post library.
Let’s get started.
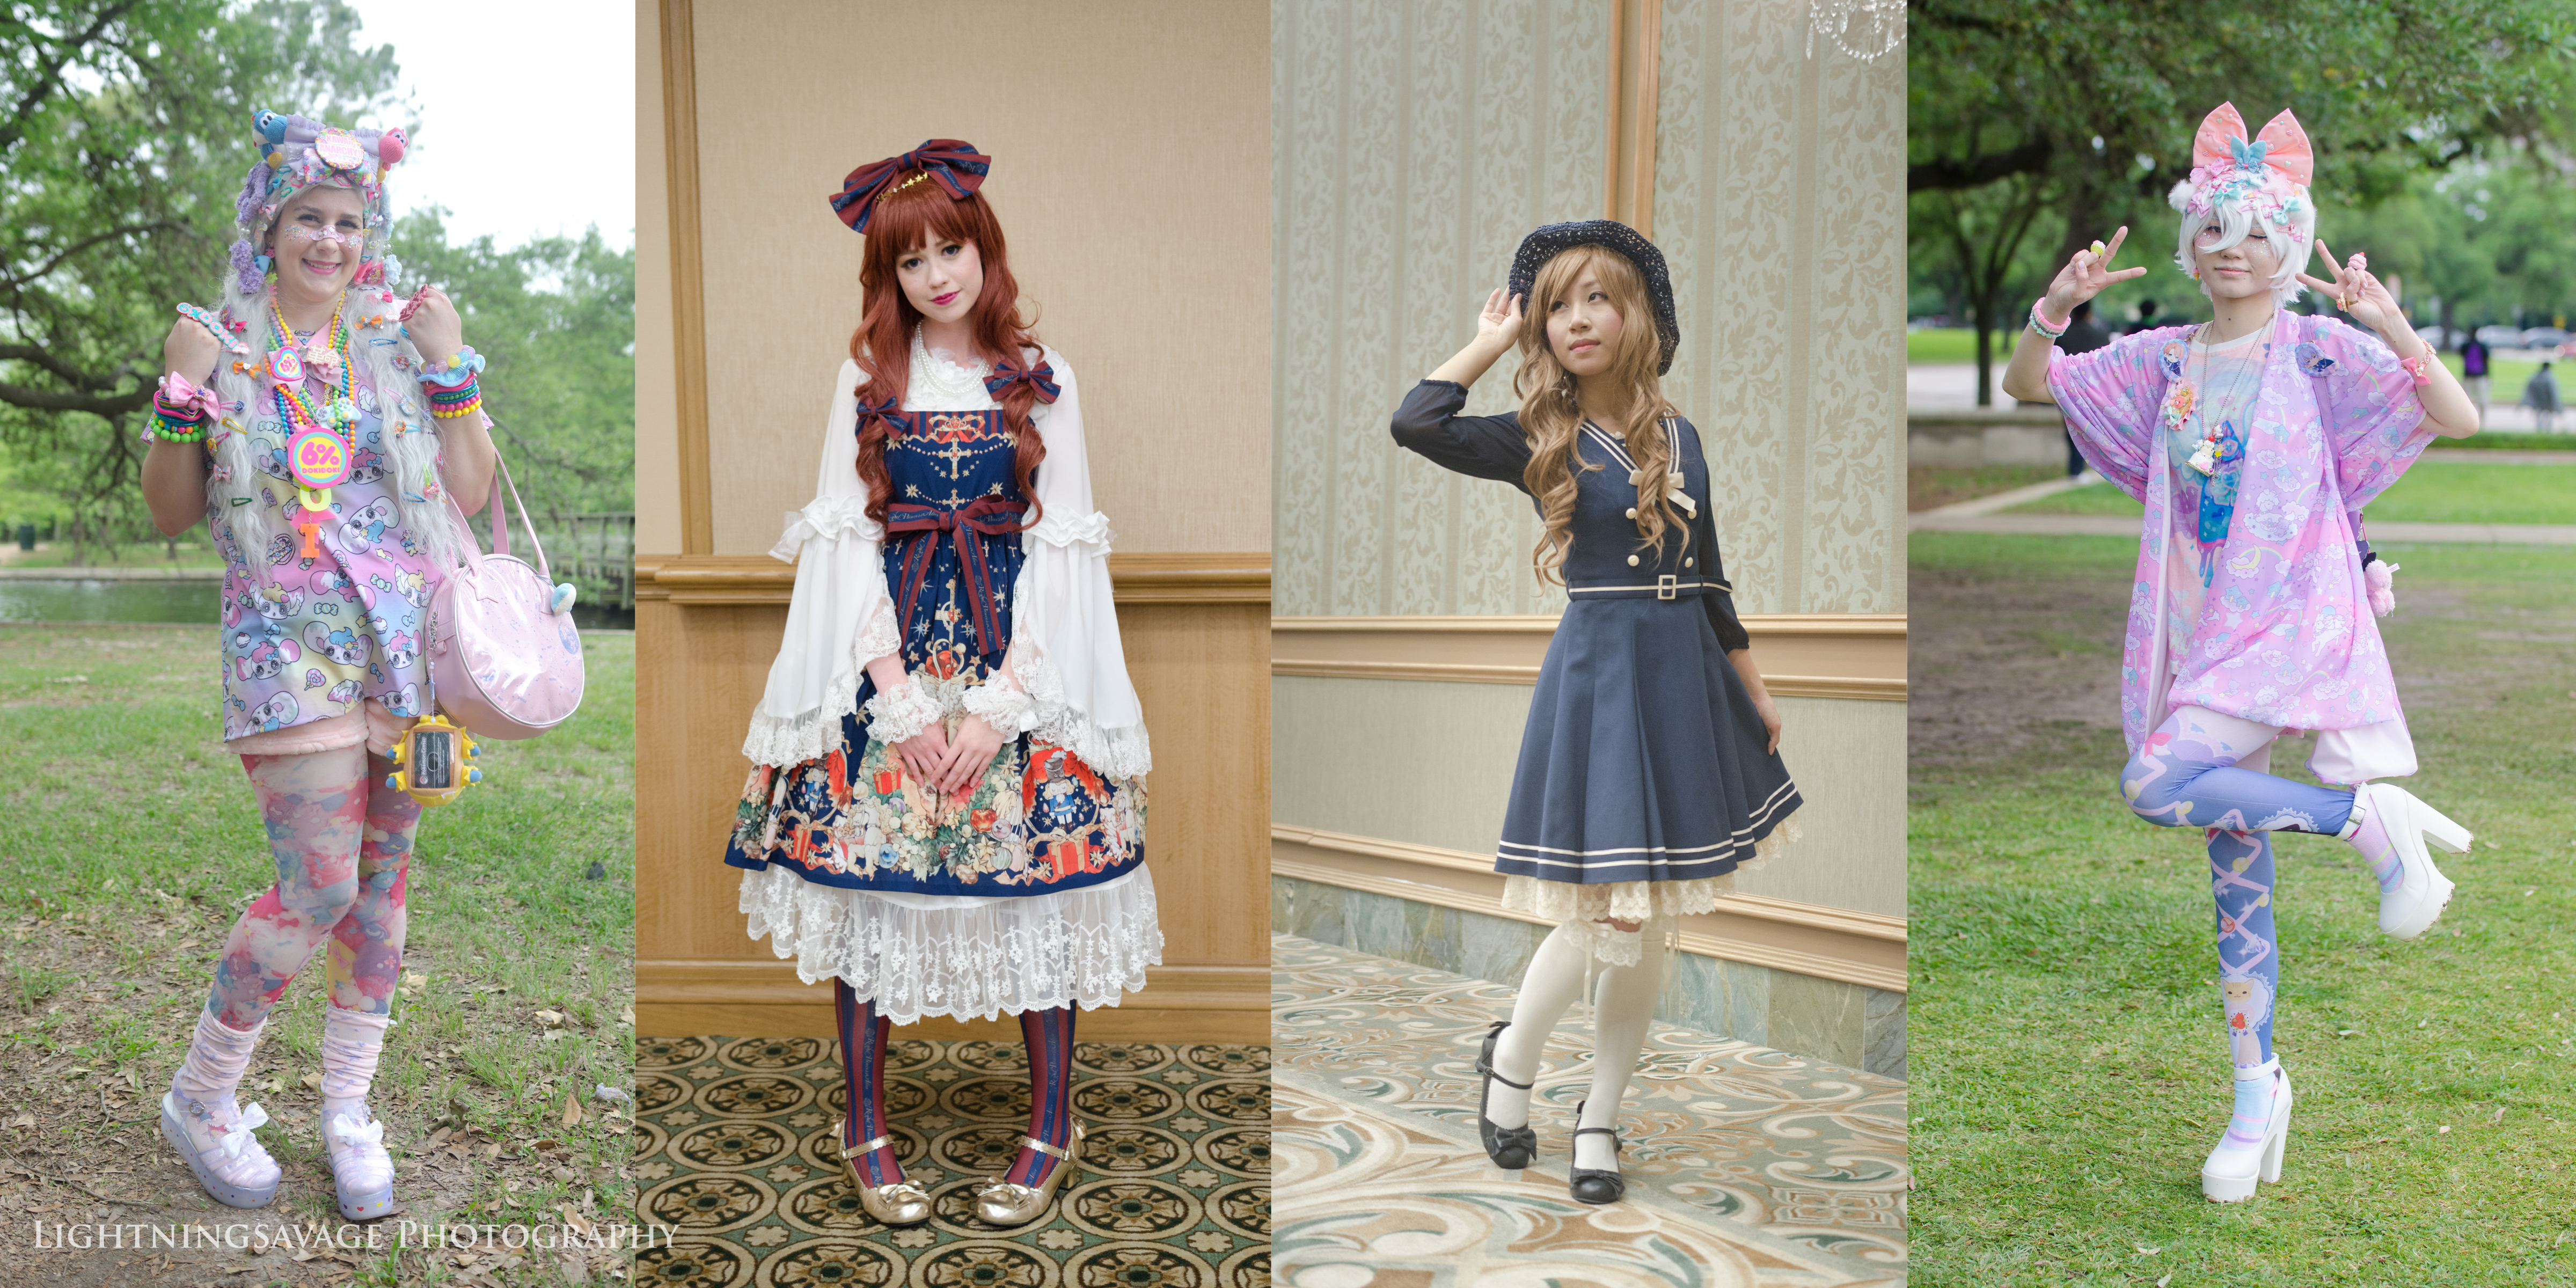
Bethany Berwick, Fair Allen, Susan Ly Johnson, Dona Ngoc Nguyen
Be Confident
The best tip that I can possibly give is to be confident! Even if you’re naturally very shy, not being afraid to own your space will make the biggest difference in your attitude and your photos. Think about being tall, and about filling the room/area with your presence. Command attention. Obviously, the command is a lot softer for sweet lolita vs. masculine posing vs. cosplaying an evil villain, but when you’re in J-Fashion, don’t forget that it’s possible to have that powerful presence without coming across as evil or tense.
A lot of people portray their confidence naturally. You’re wearing J-Fashion for a reason, right? It makes you feel amazing! Don’t let that feeling run away when a camera comes out. Remember the reason that you’re in front of the camera is to be in front of the camera. You’re there to be seen. If you weren’t, why be in front of the camera at all?
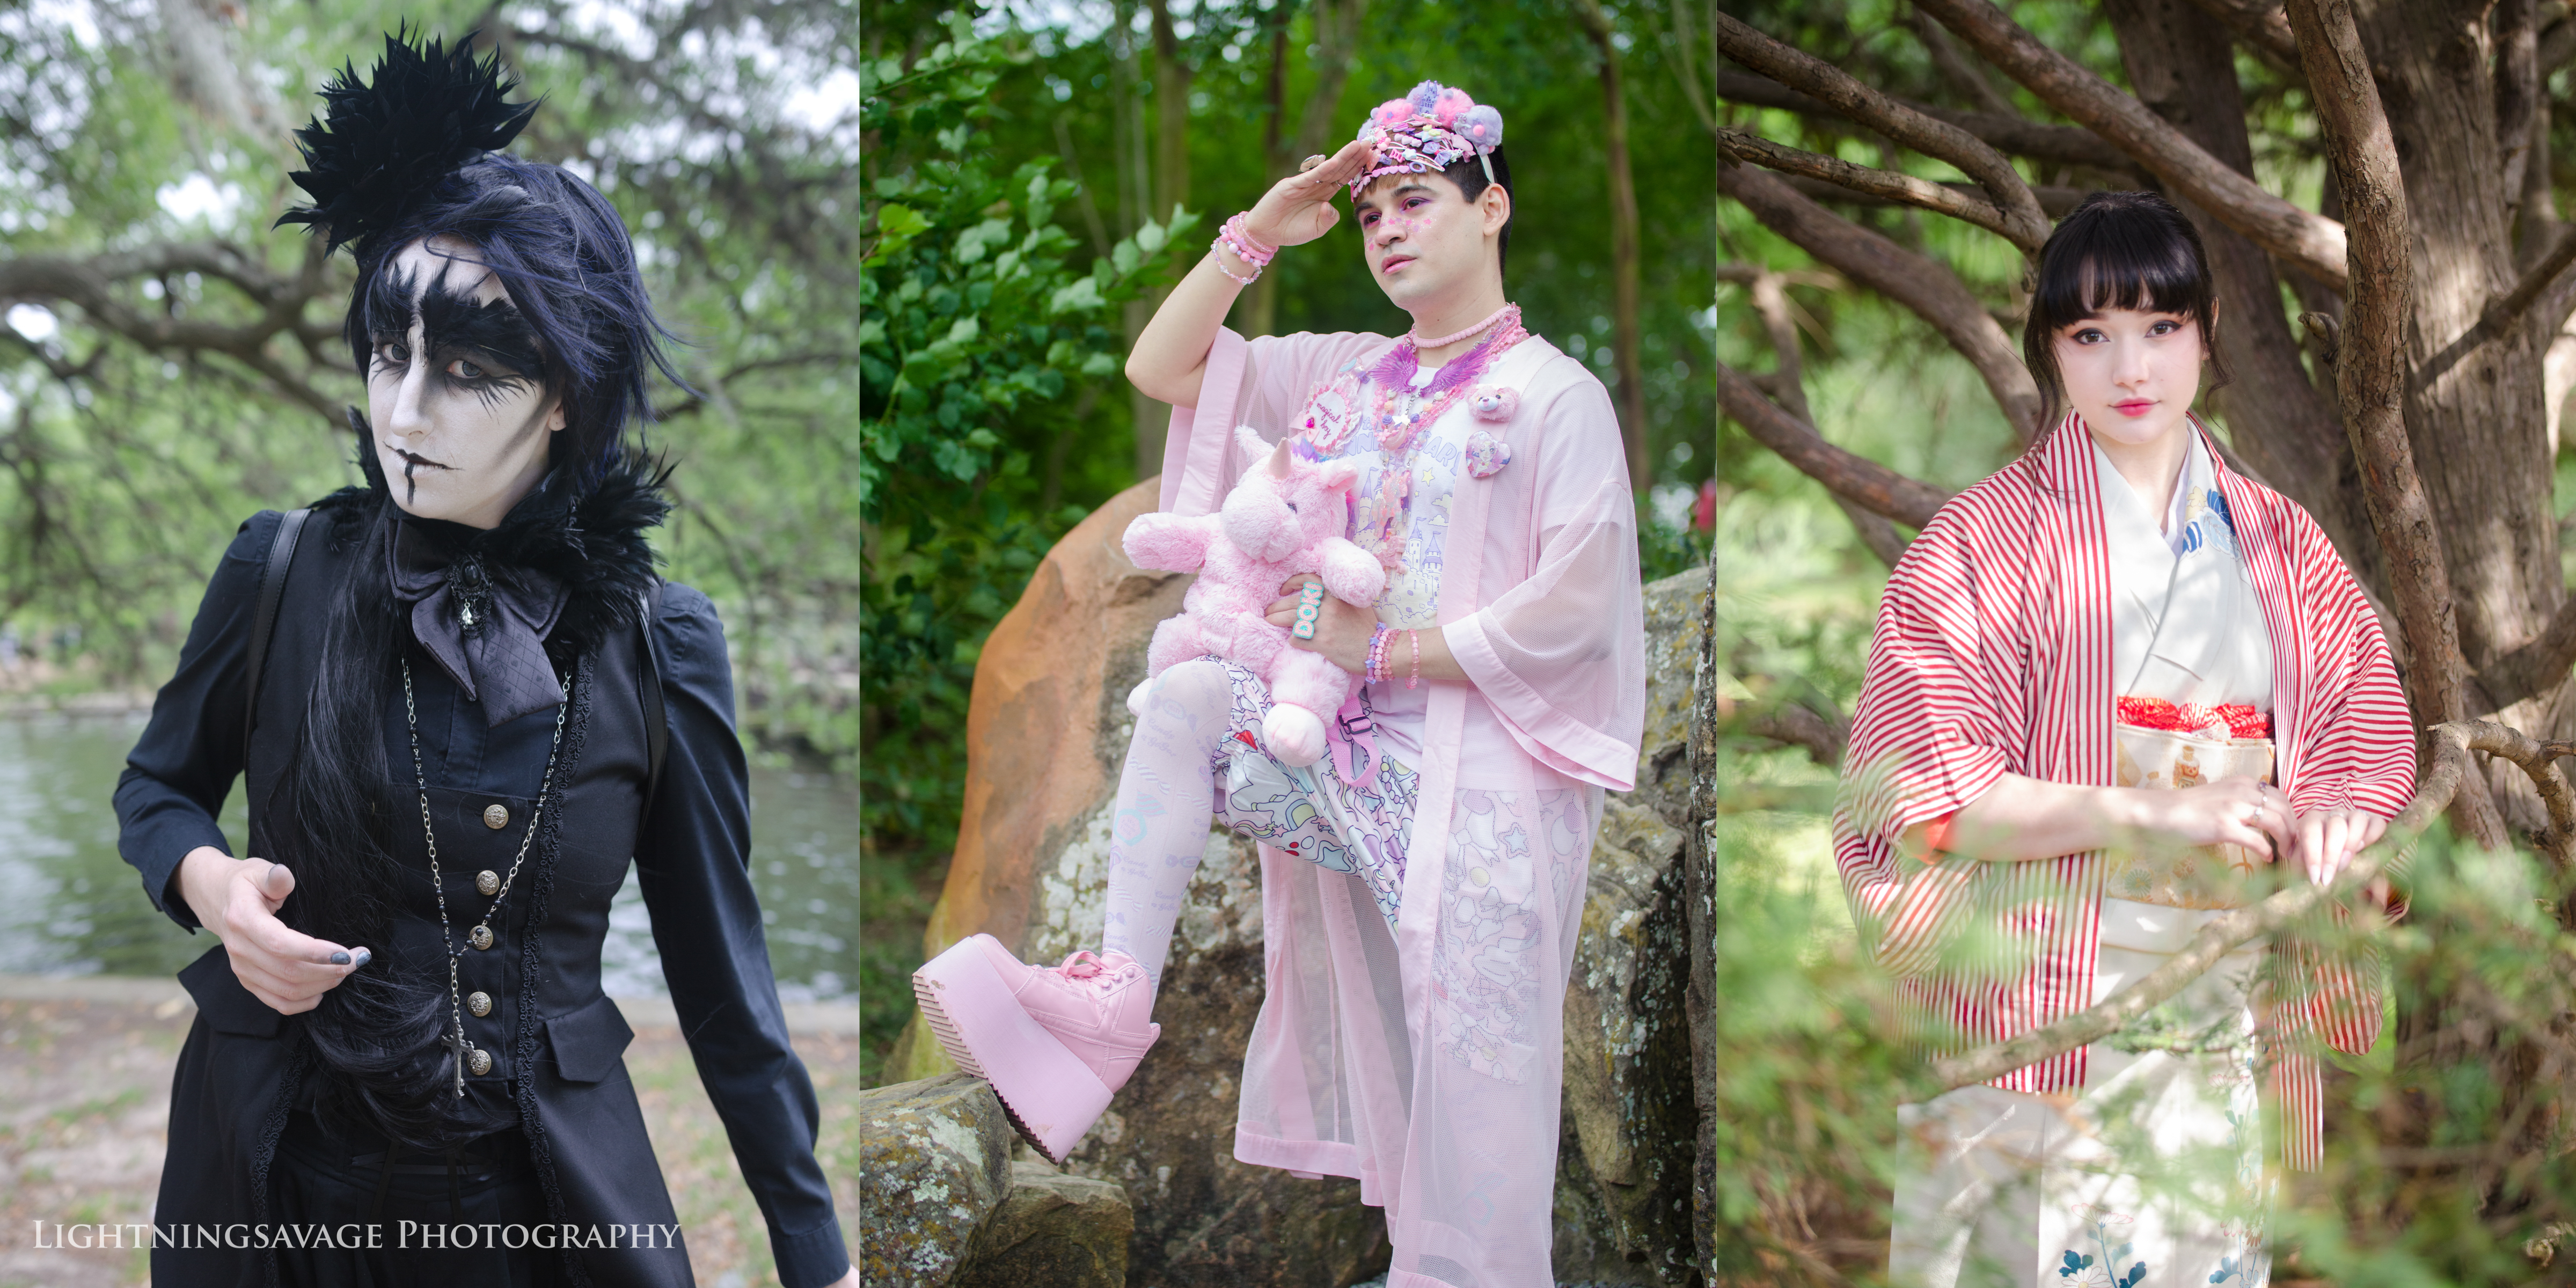
Confidence: Collin Quinlan, Vic Von Fabre, Lauren Addington
Relax
While you’re trying to come across as super confident and awesome, you may find that you look tense and stiff. This is one of my biggest issues, when I model, and it will vary drastically from person to person. The main thing I can tell you about this is that you don’t need to worry too much. Photos are disposable these days, and easily retaken. If you don’t like it, ask for more. Take selfies. Try different facial expressions. Be silly. If you get a bad photo, it’s not the end of the world—you just know what not to do next time!
If you need to, don’t be afraid to shake it out and repose. I ask my models to do this if they seem tense, and I even do it myself. Take a moment, make silly faces, jump around, do jumping jacks—and then get right back in and into the same pose you were in before. You’ll notice a massive difference in your relaxation and how confident you look on camera. More regal, less mannequin is what we’re going for. If you start to notice that you’re getting tension in your lower back or shoulders, it’s time to take a second and shake it out.
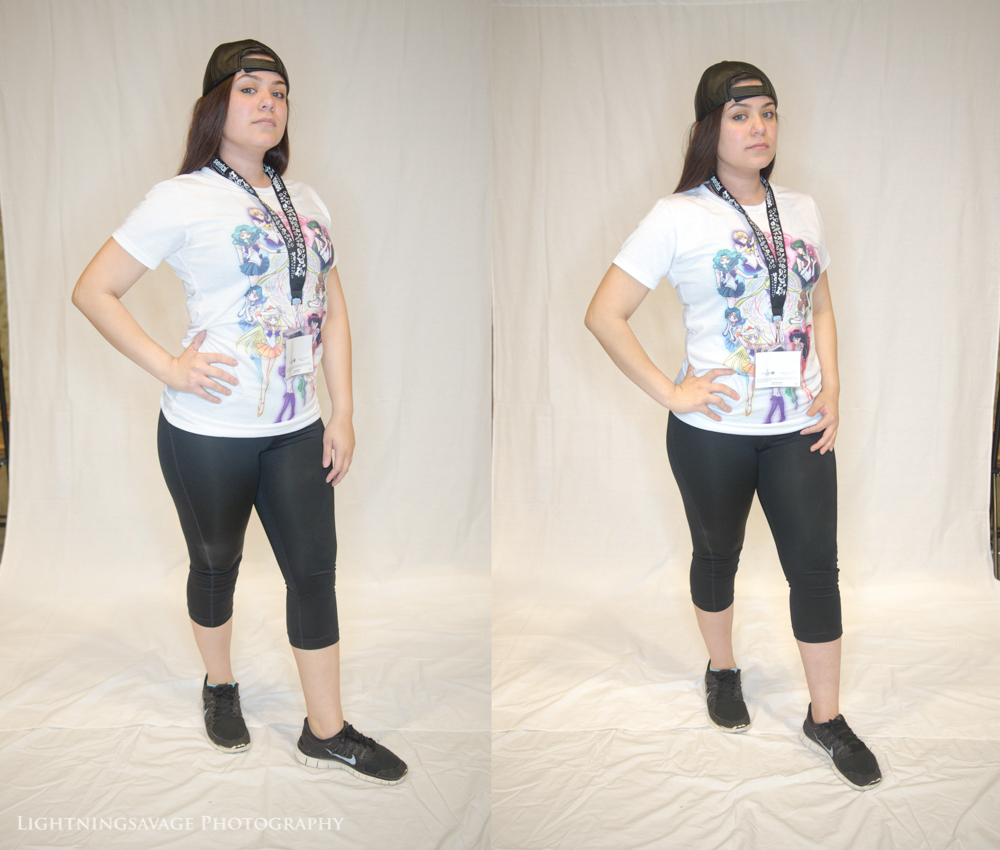
Relax! Model unknown
Keep Your Energy
Yes, you should be confident and relaxed at the same time. But what if a confident, commanding pose isn’t exactly what you are looking for? How can you avoid being too relaxed if you’re just going to be sitting on a bench somewhere? These more relaxed poses can boarder on making you look unresponsive, scared, and just boring in general, frankly. The last thing you want to look like is dead. (Unless that is what you want. In that case, more power to you.)
In photography, it’s pretty common knowledge that photos need to be interesting. But what, exactly, does that mean? the more interesting a photo is, the more time the viewer will spend looking at it. It sounds basic, but it’s true. How do you get people to look at them longer? I could go on and on about leading lines, contrast, complementing colors, but here’s what you need to know: the only player in this game is the concept of energy.
If you’re being confident, you’re introducing energy into your photo. Think for a second back to science class to the two types of energy: potential and kinetic. Since photos are stills, we’ll focus on potential energy. When a viewer is interested by an image of a person being confident, they’re wondering: What is that person about to do? Where are they going? Why are they going? Why are they dressed up so nicely? Good potential energy in a photo ramps up interest, makes the viewer ask questions. And while they’re asking those questions, they’re looking at your photo. More potential energy = more questions = more interesting = more view time. Bam.
So what if you are just sitting on a bench, or trying to look like a delicate fairy? How do you still give the viewer what they want—potential energy?
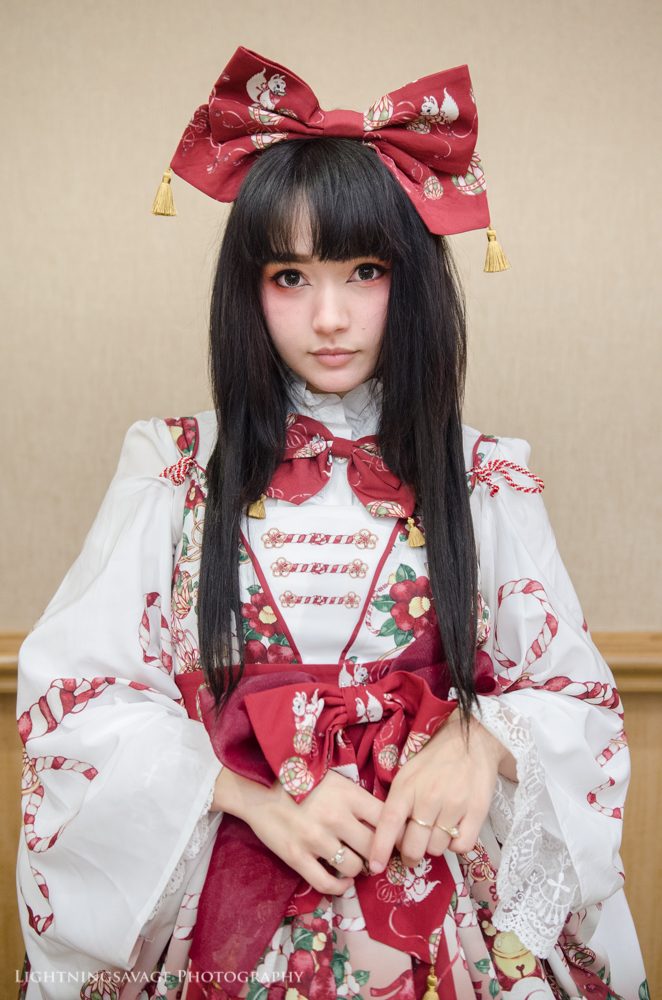
Lauren modeling for Royal Princess Alice at Oni-Con 2017
There are several ways you can do this. In general, remember that the confident presence should shift locations based on where you want your focus to be. If you want your body to be relaxed and delicate, then the image still needs an area of movement, emotion, and energy! One common place to show that confidence is your eyes—take the photo of Lauren for example. She is, in fact, just standing there. But why is it so interesting? All of the potential energy is in her eyes. It makes it interesting, and that’s exactly where she wanted the focus of the photo to be. So pick an area where you want the viewer to look at for longer and focus all your potential energy there. Make that area have a little spark of mystery to it! If that still doesn’t cut it, if you still think you look boring, one little trick here is to softly flex your muscles under your dress as you stand there. This can help you look more present, specifically if you’re under a lot of clothes. But don’t flex too much, or you might end up looking like Ladybeard—unless that’s what you want!
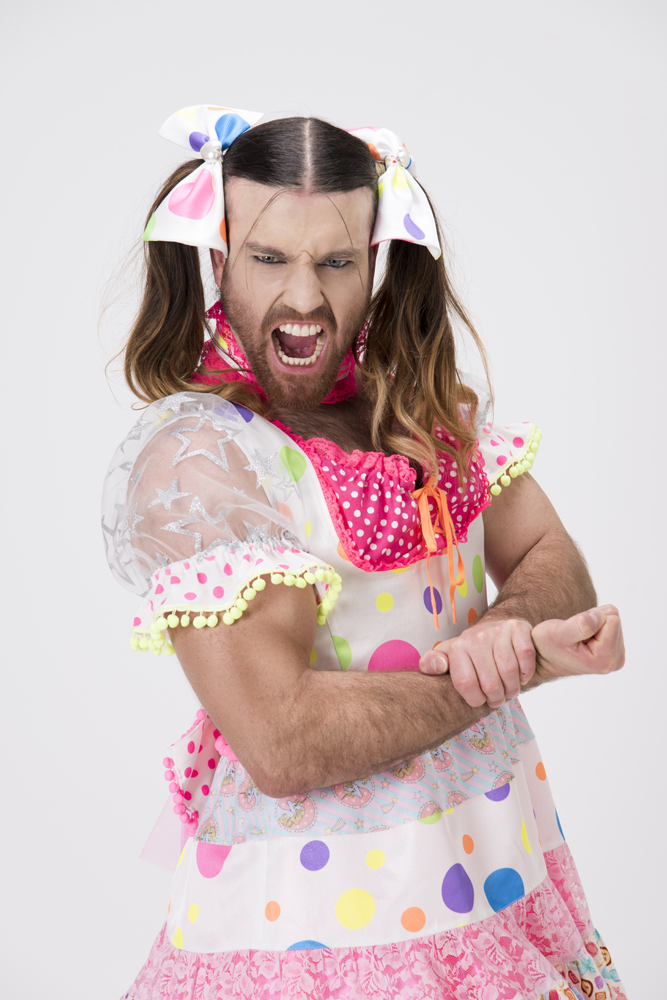
Ladybeard. Seriously, I love this guy. Image from wikipedia.
If the delicate look is what you’re going for, like it is for a lot of lolitas, practice the confident poses first, then try to carry on that same confident feeling into these understated, relaxed poses. Remember, there’s no right or wrong for posing—it’s all about you and your body, and what you’re looking for from the photo.
Note: For those of you interested, things like leading lines, composition, contrast, and color play add energy—the same as a great pose! That’s why a photo of architecture can be so interesting, even though there’s not a person there.
See Yourself Through the Camera Lens
Try to see yourself through the lens. This may be difficult if you don’t have experience taking photos of other people, but it’s something you’ll naturally get used to doing once you either spend time posing other people or spend time in front of the mirror looking at and tweaking your own poses. A lot of it has to do with being incredibly familiar with what you’re wearing and how it photographs and lies on you—inside and out.
Even if you don’t know the photographer’s vision, you can imagine how you look from their point of view. Is your arm hidden behind your body (body between your arm and the camera)? Does the angle of the camera make your eyes shadow underneath your hair? Is the lapel lying in a way that will show the pack of the enamel pin? If you can, fix it! It’ll make a world of difference in your photos.
If you having trouble with this out-of-body experience, take selfies! Get as many different angles as you can, making sure to pay attention to the angles of the camera as well as how you look. Watch the screen and take note of how little changes in things you do make huge changes in the photo. Once your comfortable with selfies, take the process further: take full-body photos in the mirror. Find go-to poses and start from there. See how those go-to poses look from different angles, and make note of how those poses change when you wear different things and different silhouettes. Snap, snap, snap!
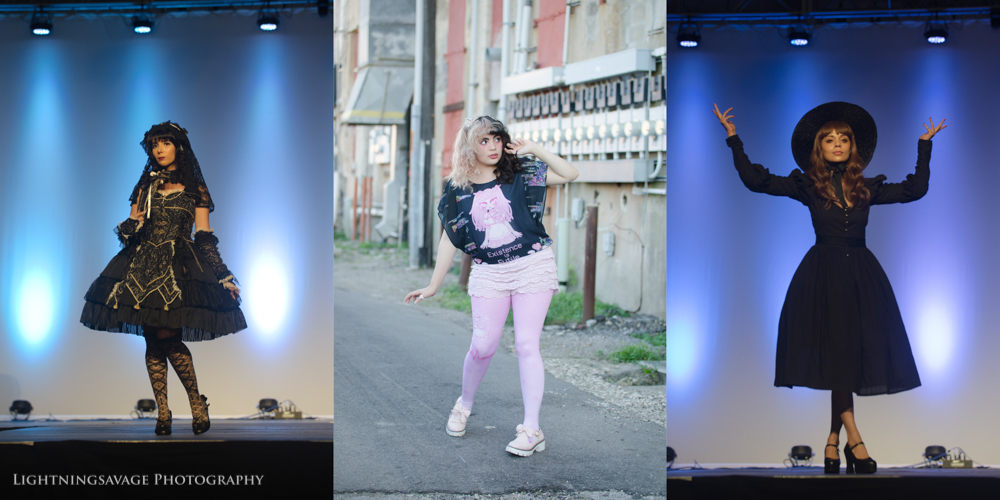
Awareness: Eugenia Salinas (Baby the Stars Shine Bright), Sally Asbury (Puvithel), and @infantedefunte (IG) (I Do Declare)
Be Aware
This goes hand-in-hand with the tip above, but this expands the previous tip to your surroundings. This is possibly the least important out of the big 5, as the photographer will be keeping an eye out for this one for sure, but it will enhance your understanding of photography to help you get the shot you want (especially if you’re shooting with a new photographer or one that doesn’t seems receptive to your vision).
When you pose, be aware of the light around you. Is your face being illuminated by mottled light/shadow underneath a tree? This isn’t flattering, and distracts from your face and your coord (and who wants that?). When you take selfies, take a lot in different lighting and with different expressions. Find a light that’s good for you, and then try to imitate that lighting whenever you take photos at a meetup, a convention, or wherever.
In addition, be aware of your surroundings. If you want to be centered against a wall between two lamps, for example, are you actually centered? Most people I’ve photographed don’t have an issue with this one, if they’re aware of where they are standing! If you’re concerned about getting something in the background (like a light switch), tell your photographer and they can shoot around it, hide it with something (like you), or ask them to edit it out later.
In addition to your surroundings, be aware of what you’re wearing! It can go a long way toward helping you look thinner. For example, if you’re wearing all one color, it can make you look wider, especially if it’s black. Keeping distance between your torso and your arm, so you can see the scene behind you, can help prevent this. Take Khalif’s photo below (in the black and white coord) for example: if he had been wearing a black blouse, it would have made him look far wider, since there’s no gab between his body and his arm, no break in color.

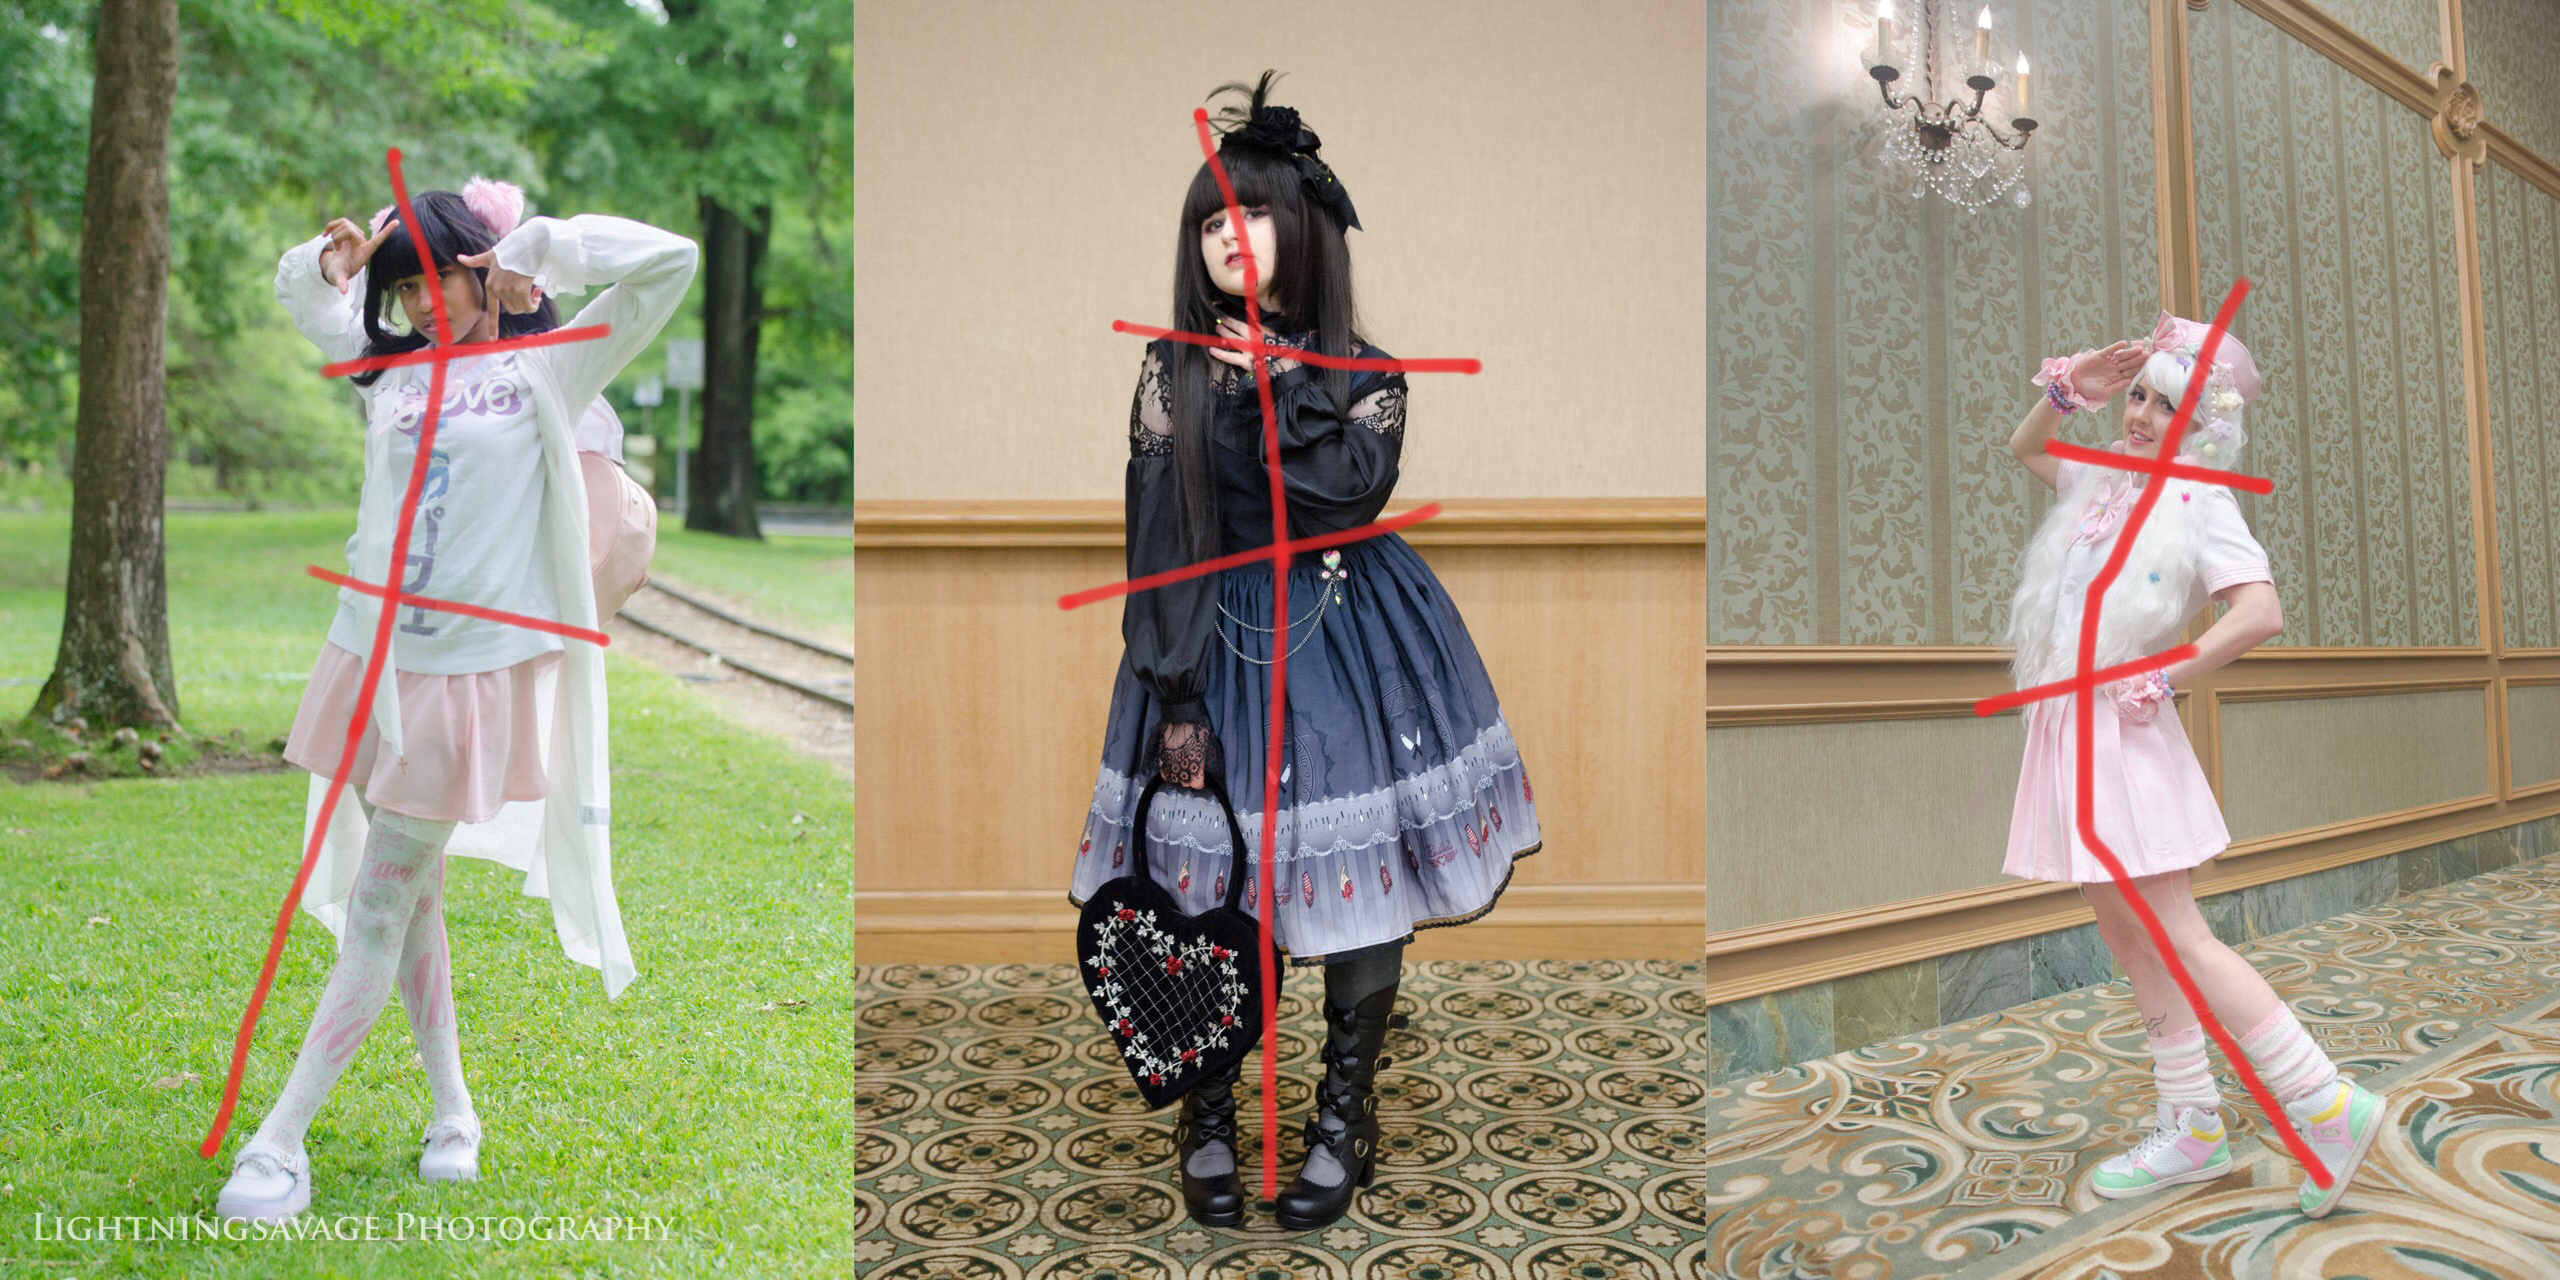
Parallelism: Imani Kibble, Bree Love, Stevie Quinlan
Avoid Parallelism to the Axes
Yes, there’s going to be some geometry here.
You remember parallel lines, right? Two lines that don’t intersect even if they go on forever. In posing, parallel lines can be uninteresting and unflattering. You rarely want to have any major lines of your body parallel to each other or to the three axes—x (horizontal), y (vertical), or z (directly towards or away from the camera). Strictly vertical lines are uninteresting at best, and strictly horizontal lines are unflattering and might make you look wider than you actually are. And if you hold out your arm directly towards the camera, for example, you risk covering up most of your body, losing details in your arm, and warping how the camera sees you. They say the lens adds 10 lb—this is sometimes true, especially if you lose track of your axes.
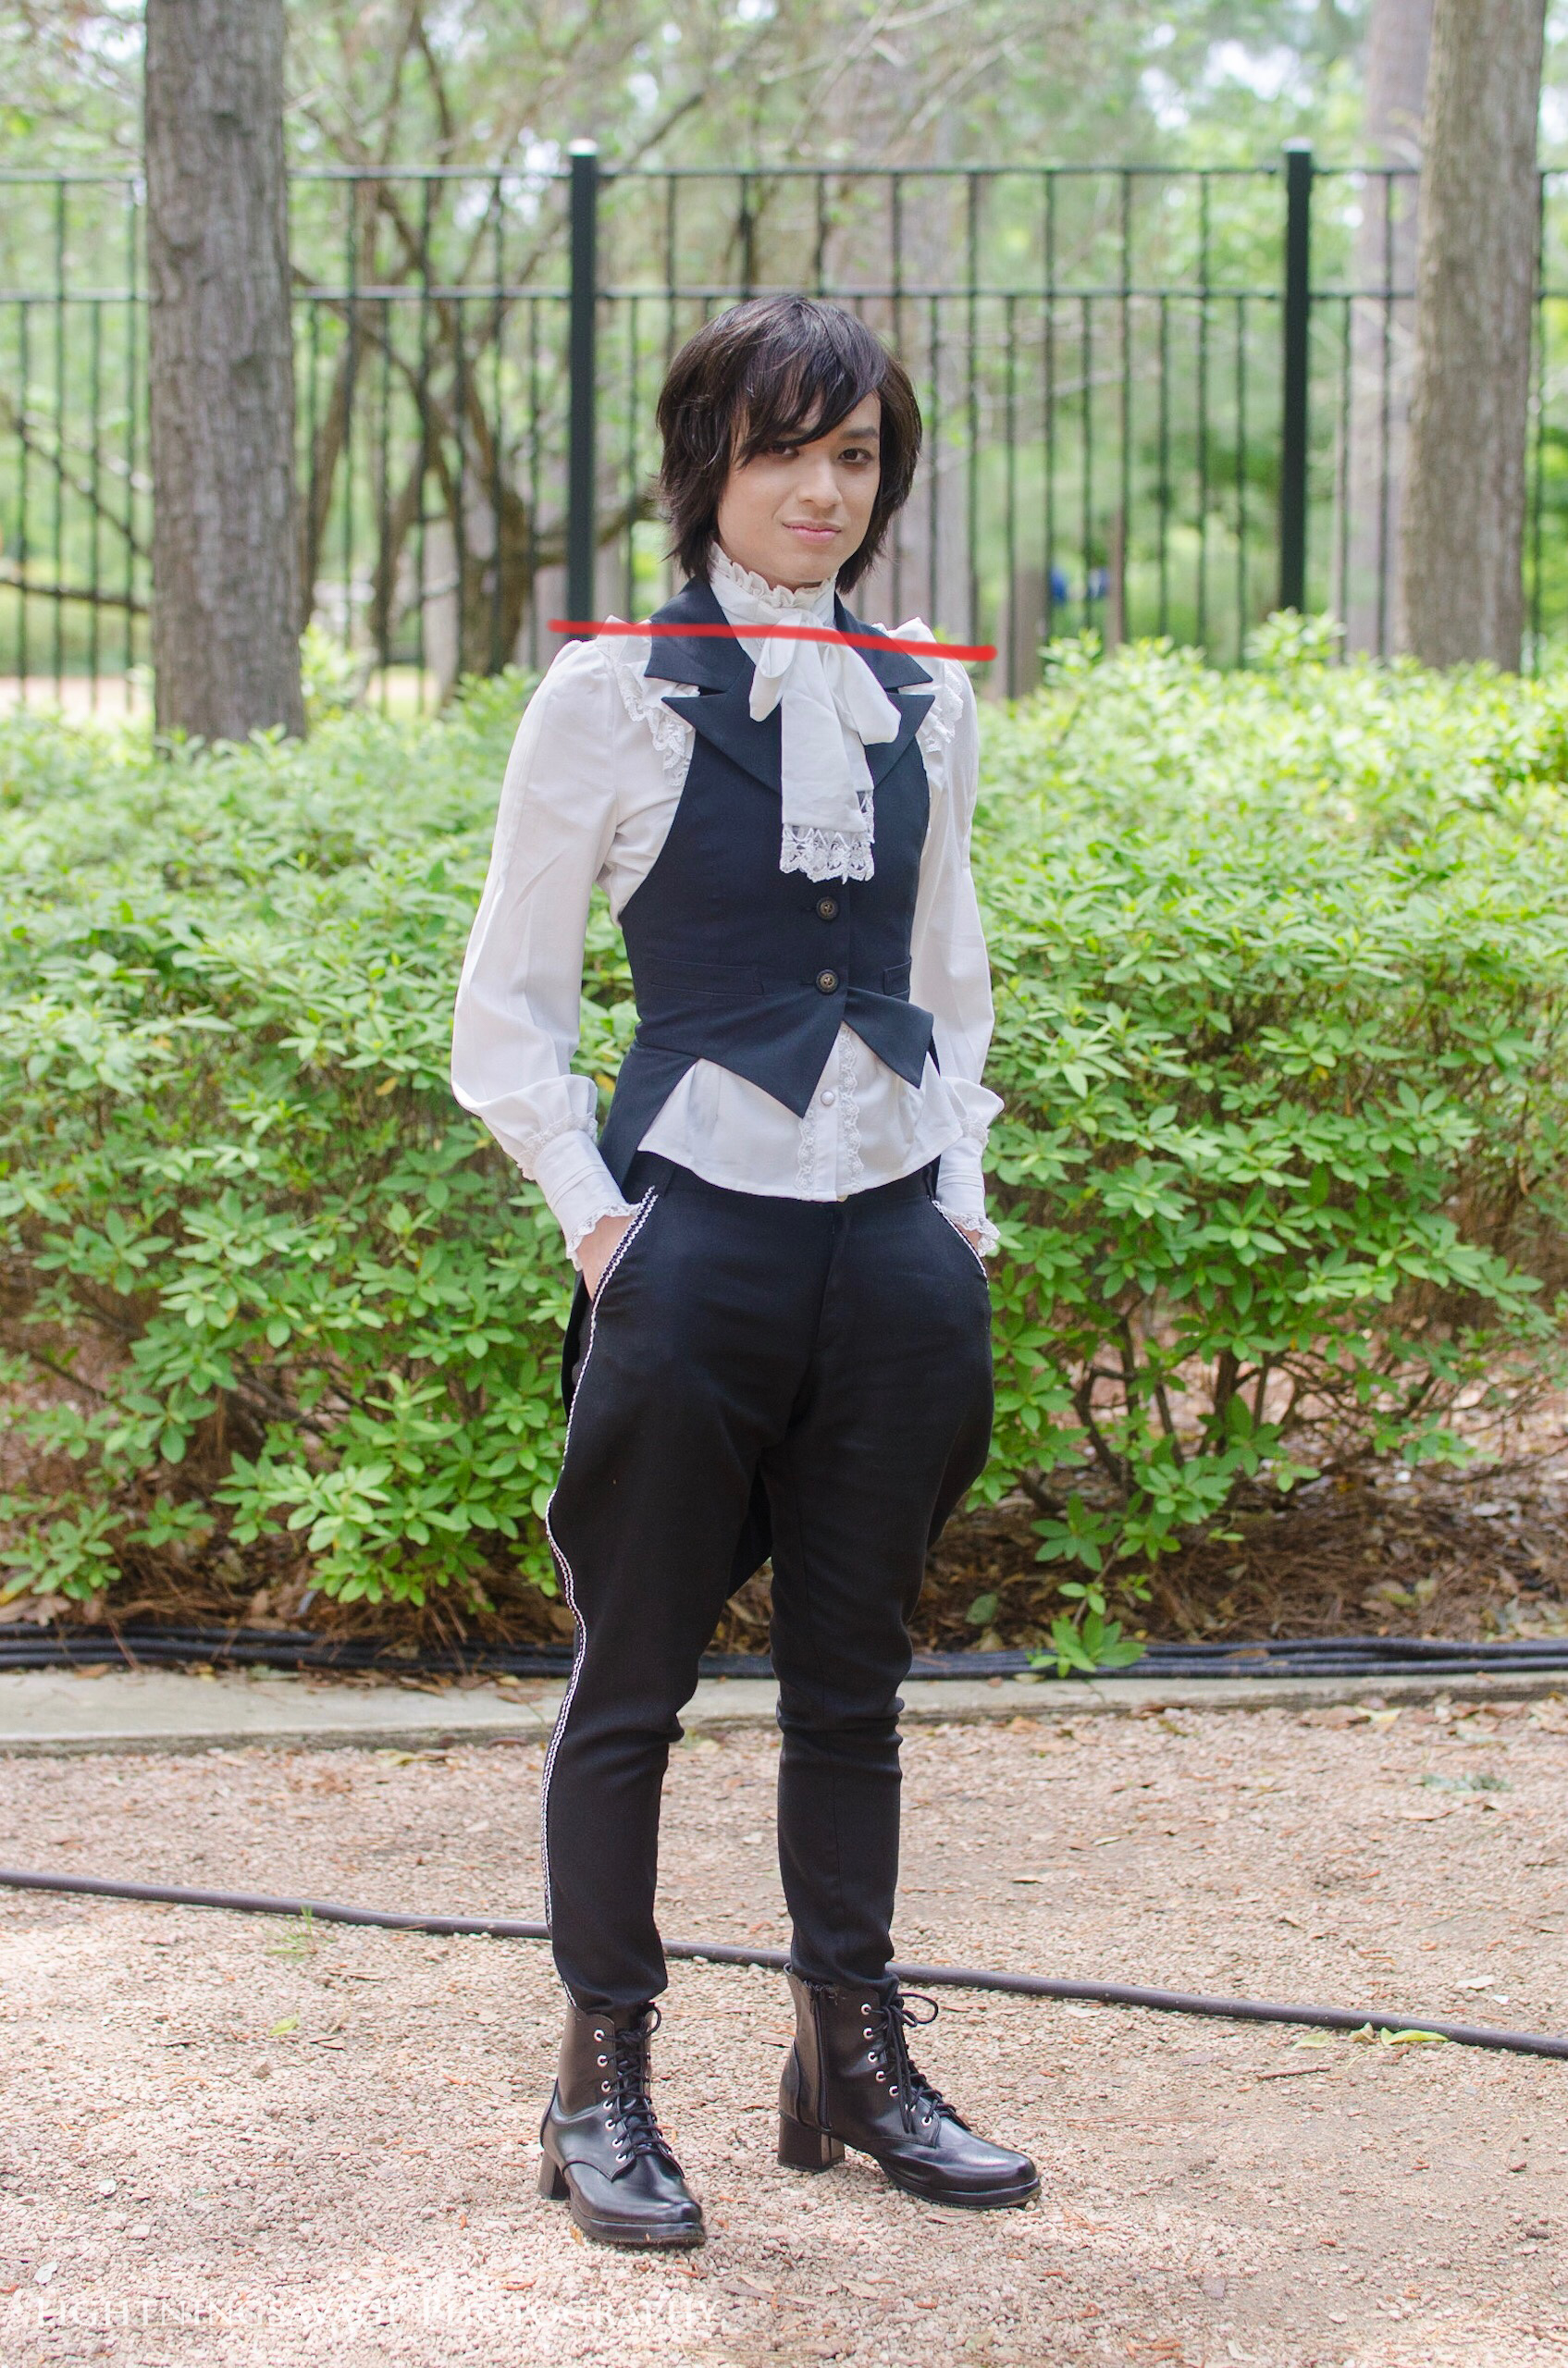
Khalif Siahaan
Parallelism can be fixed by turning to a 20-degree angle to the camera. Remember, it’s about what the camera sees, not about how you’re actually posed, necessarily. This means that yes, your shoulders can still be parallel to the ground if you’re turned to an angle, simply because if you’re turned, the way the camera sees your shoulders is slanted. Take the photo above this paragraph as an example. Khalif’s shoulder line is technically parallel to the ground, but because he is turned it looks like it’s slightly slanted in the photo. It’s a bit more difficult to see that change in his hips, however I’m sure you’d agree with me when I say that the fact that he’s turned makes him look ever-so-slightly slimmer.
Most important tips—done. You made it through. If you want more specifics, stay tuned for both masculine and feminine tips, fashion show advice, and more!
Kal from Lightningsavage Photography specializes in creative portrait photography for J-Fashion enthusiasts and more. He has served as the J-Fashion event photographer for Oni-Con 2016–2020, as well as fashion shows, meetups, and personal shoots. He is also a co-owner of Kuroshiro Kawaii. You can follow him on Instagram at @lightningsavage_photography and @kaldec_
He is currently into visual kei and EGA fashions.


